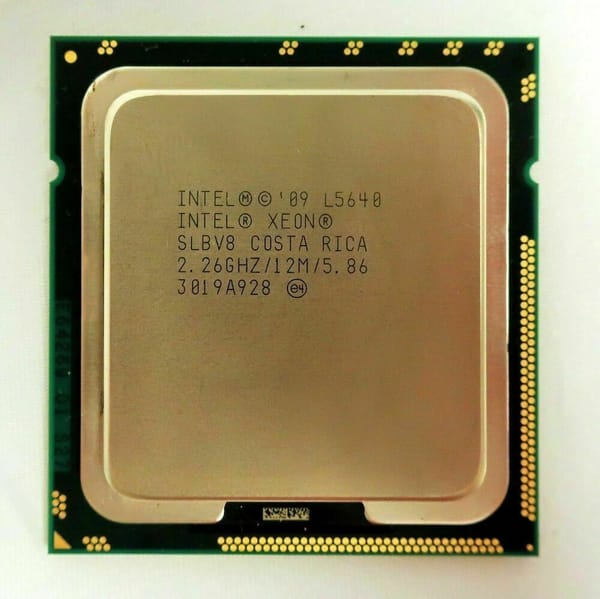
2024 Tesla Model 3 Long Range
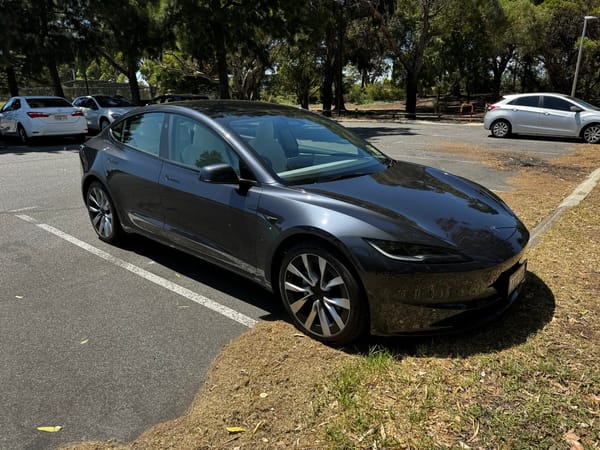
We’ve ordered a 2024 Tesla Model 3 Long Range (Highland). Here is the demo we drove a few weeks ago. Ours will be the same, but with black interior instead of the white seen here. Estimated delivery is Feb 2024.
We’ve ordered a 2024 Tesla Model 3 Long Range (Highland). Here is the demo we drove a few weeks ago. Ours will be the same, but with black interior instead of the white seen here. Estimated delivery is Feb 2024.
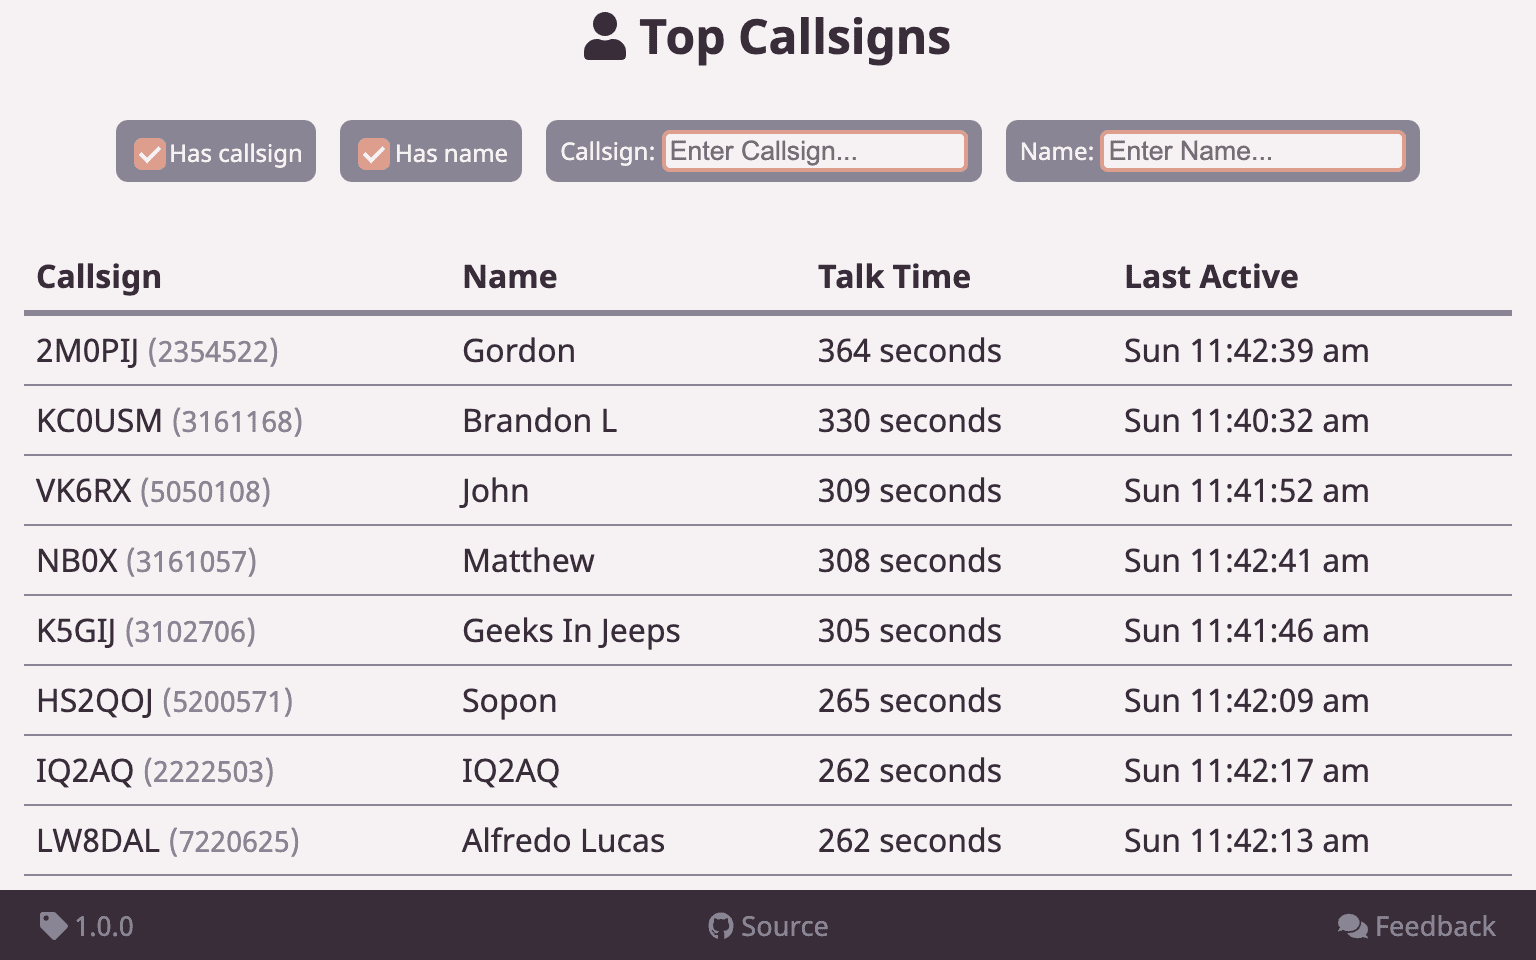
Looks like we had an honourable mention on the Brandmeister top talkers list. While it’s my callsign, this is the busy VK6-HUB group that has put this here. This is a screenshot from BM’s Top Activity app. https://www.brandmeisteractivity.live/
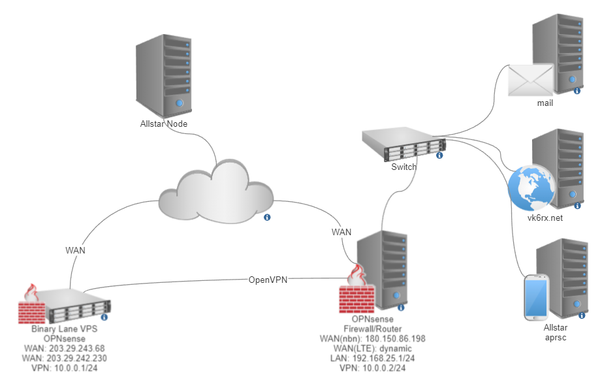
I’ve been working on a fail over system for my hosted services. Getting this working means that I am no longer locked into my internet provider for a static public IP. Instead the IP of the VPS is used. In this case I have setup OPNsense on a VPS

See attached for a high quality scan of the Instruction Book/User Manual for the Fordson Dexta. I found this impossible to find, so ended up buying a copy from England. The print is dated 1960 and is the “Export Copy”. All pages are included in my scan and have

Had an issue with my ~2002 Cox New Generation ride on lawn mower. These Australian made ride on mowers are renowned for their robustness and easy repair with basic tools. But, they are not particularly well designed/engineered in all areas and have had their fair share of issues. This
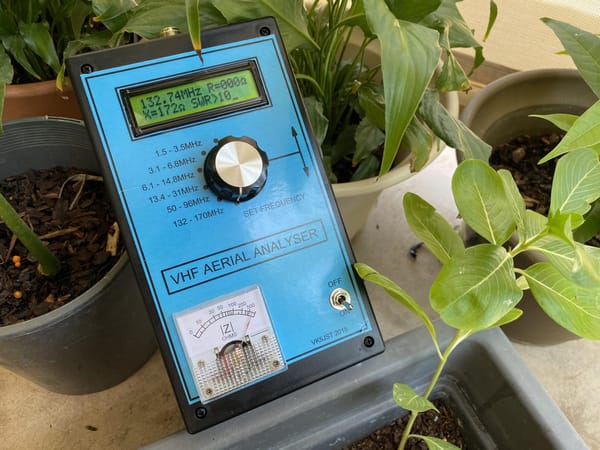
This week in amateur radio I finally put the finishing touches on my 2015 VK5JST (Jim) VHF Aerial Analyser. Originally I purchased this kit from Adelaide Hills Amateur Radio Society (AHARS) in 2015. But life and work got in the way and I have taken this long to get around
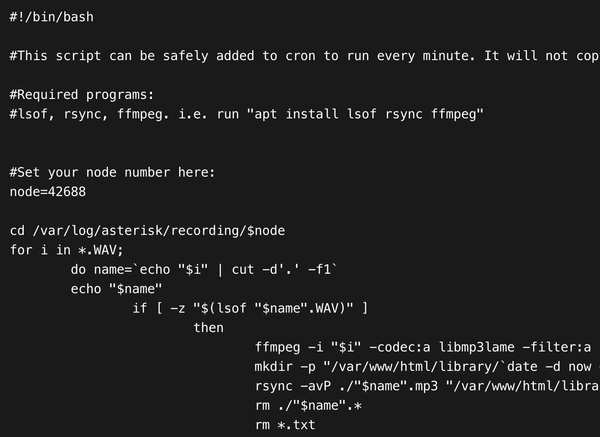
Here are some details on setting up an automated recording system for AllStar Link nodes. The ground work for this has been done in app_rpt, but this script will assist in publishing the recordings making them more accessible. The original script was from Joshua Nolton (KG5EBI) – Self Proclaimed Engineer
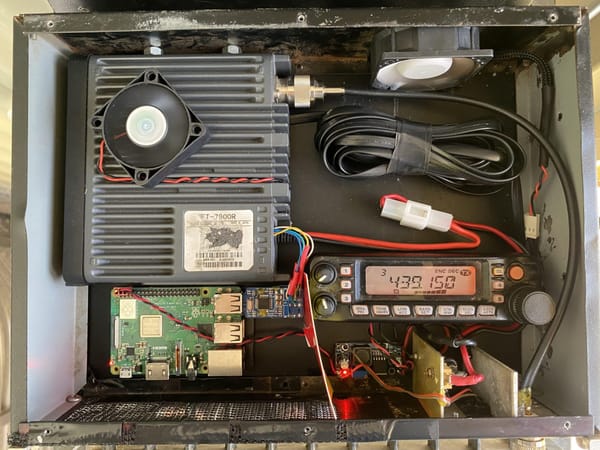
* Node Number: 42688 * Freq: 439.150 Simplex * CTCSS: 77Hz * TX Tone: 77Hz * Power: 20W * Broadcasting the WIA News and VK6 NewsWest on Sunday at 0900 and 1900. I’ve just built a basic node for use at my home QTH here in Kununurra. The node is made up of: * Yaesu
This week I have setup a windows VM on my server to run RMS Trimode fro the Winlink network. This setup is running for several HF bands. Details can be seen here.
About 12 months ago (2018) I decommissioned my FreeNAS based file server in preference of a Synology DS918+. While this device has been fantastic, and I do recommend it, it’s a bit boring and not fitting my theme of DIY and putting retro hardware to good use. The main
The first PC projects for the site. The aim is to setup a Dual Slot 1 Celeron as a router. I’m not sure if the performance will be enough for my 50Mb VDSL connection, so will have to wait and see. The Slot 1 Celeron does require some modification
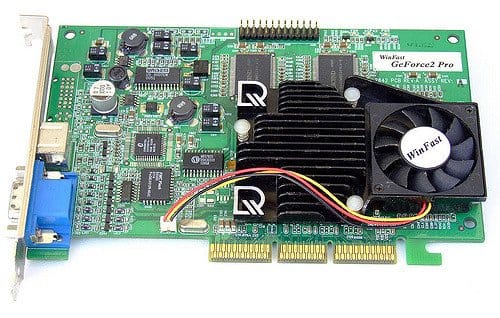
Back in the day I used to own a Leadtek Winfast GeForce2 Pro. This, at the time, wasn’t a bad 3D card for the PC. The cooling solution on this card wasn’t fantastic and soon failed. Using whatever I had laying around at the time I had a