All posts by john

Fixed IP Failover

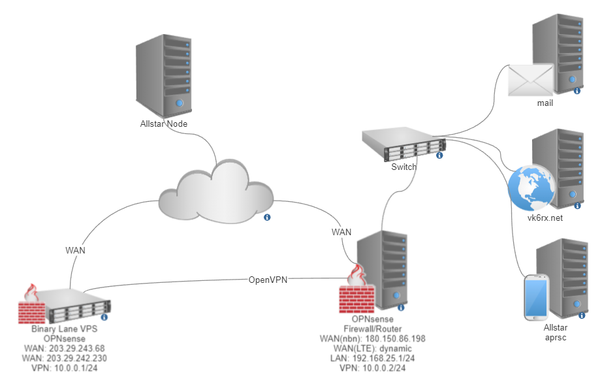
I’ve been working on a fail over system for my hosted services. Getting this working means that I am no longer locked into my internet provider for a static public IP. Instead the IP of the VPS is used.

In this case I have setup OPNsense on a VPS hosted by Binary Lane (although any VPS with an external IP would work). My OPNsense box at home connects to the VPS via OpenVPN (P2P). Then a bunch of routing and firewall rules take care of the rest.

A setup of gateways with priorities covers off on the dual WAN on the home router side.

Cox New Generation Steering Box

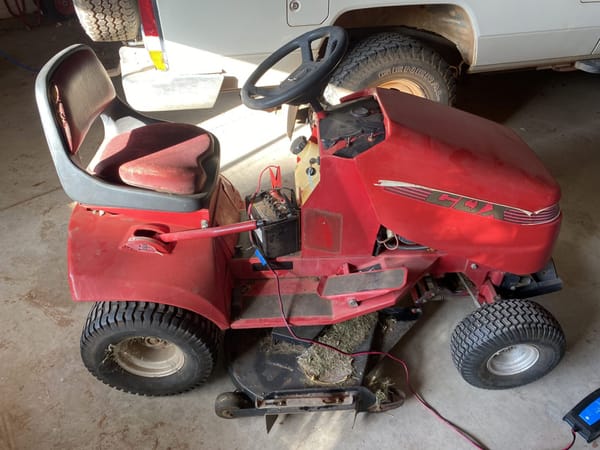
Had an issue with my ~2002 Cox New Generation ride on lawn mower. These Australian made ride on mowers are renowned for their robustness and easy repair with basic tools. But, they are not particularly well designed/engineered in all areas and have had their fair share of issues.

This model has a weak point in the plastic steering box. The box is a 2:1 and angle drive in one. The output of the box drives a square shaft. The output is a glass fibre reinforced plastic gear with a slot cut in it and a hose clamp to tighten to the shaft. This is a terrible idea and the system was dropped quickly from later model revisions.
Not being able to easily get parts for this mower anymore given its age (and not to mention that a replacement gear would likely fail again anyway) I decided to modify the output gear using an old socket, couple of large washers, and a few bolts.

  • Cut 1/2″ socket in half (half inch socket fits nicely on the square shaft.
  • Weld socket to M12 x 37 x 3.0 washer. I welded completely on the inside through the hole of the washer and and a few tacks on the outside that you can see in the pictures.
  • Drill three holes in washer and another washer to match. Countersink the washer that will go inside. Don’t worry there is plenty of room for the washer and even bolt heads if you don’t have countersink bolts.
  • Cut off protruding plastic from crown gear and sand flat to accommodate washer/socket.
  • Match and drill holes in crown gear.
  • Sandwich crown gear with socket/washer and second washer using 3x M5 x 20mm bolts.
  • Enlarge gearbox output cover hole to accommodate larger output.
  • Reassemble and enjoy nice tight steering that doesn’t slip.

Cox Part Numbers for the steering box.

13354GEAR,BEVEL,WHEEL,SLOTTED (CROWN/OUTPUT)
13355GEAR,BEVEL,PINION

VK5JST VHF Aerial Analyser (2015)

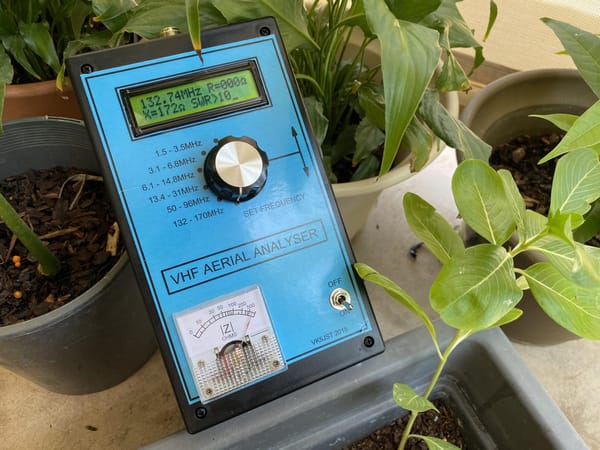
My recently completed 2015 version of the VK5JST Aerial Analyser

This week in amateur radio I finally put the finishing touches on my 2015 VK5JST (Jim) VHF Aerial Analyser.

Originally I purchased this kit from Adelaide Hills Amateur Radio Society (AHARS) in 2015. But life and work got in the way and I have taken this long to get around to putting it together.
This kit featured in the December 2015 edition of the Australian AR Magazine.

The kit was easy to assemble, setup and test using Jim’s instructions. All parts were included with clear instructions and diagrams. Here is a scan of the instructions that came with my kit:

The AA works very well and will be a mainstay in my kit for years to come.

A new improved version of the AA from Jim is now available for a very modest price including shipping – see the link below.

For those just starting out in the hobby, this bit of kit is an excellent way to get started in electronics with a project that will prove to be a very useful tool for building and testing antennas. Even with limited skills in soldering etc, if you have a good soldering iron, take your time and follow Jim’s instructions, you will have no issues.

http://www.vk5jst.com/

AllStarLink Recording Script

Here are some details on setting up an automated recording system for AllStar Link nodes. The ground work for this has been done in app_rpt, but this script will assist in publishing the recordings making them more accessible.

The original script was from Joshua Nolton (KG5EBI) – Self Proclaimed Engineer on youtube.
Joshua’s post is here: https://dvswitch.groups.io/g/allstarlink/topic/recording_your_qso_s_as_an/32389801

I have modified his script to not cut off any currently recording transmissions and also to sort the recordings in to day, month and year.

The script can be added to cron to automate everything.

Firstly watch and follow the instructions in the above video, using the modified script below instead. Note that my script location and name may be different to the ones used in the video and you also need to install lsof.

You need to do the following:

  • enable recording in rpt.conf
  • create the script using the code below and put it in a suitable location – I just use /var/log/asterisk/recording/encodepost.sh as the location and name.
  • change the script file to allow it to execute (chmod u+x)

You will need to install the following:

  • apache2 – to serve up the files.
  • lsof – for checking if a recording is being accessed.
  • ffmpeg – for conversion of the audio files to mp3 to save space.
  • rsync – for copying the files around.

Bash Script:

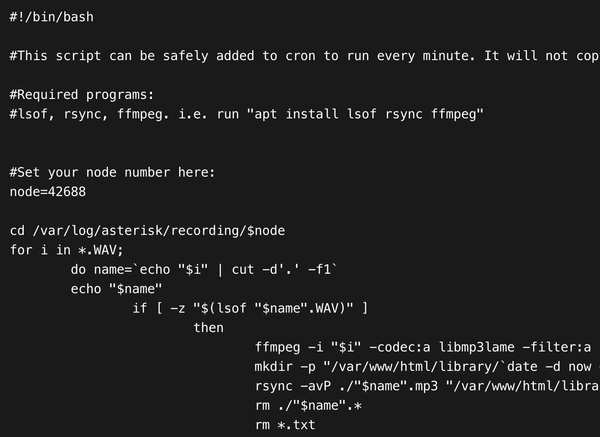
#!/bin/bash

#This script can be safely added to cron to run every minute. It will not copy and convert the currently recording file as it checks to see if each .WAV is in use by using lsof.

#Required programs:
#lsof, rsync, ffmpeg. i.e. run "apt install lsof rsync ffmpeg"


#Set your node number here:
node=42688

cd /var/log/asterisk/recording/$node
for i in *.WAV;
        do name=`echo "$i" | cut -d'.' -f1`
        echo "$name"
                if [ -z "$(lsof "$name".WAV)" ]
                        then
                                ffmpeg -i "$i" -codec:a libmp3lame -filter:a loudnorm -qscale:a 2 "${name}.mp3"
                                mkdir -p "/var/www/html/library/`date -d now +%Y`/`date -d now +%m - %B`/`date -d now +%d - %A`"
                                rsync -avP ./"$name".mp3 "/var/www/html/library/`date -d now +%Y`/`date -d now +%m - %B`/`date -d now +%d - %A`"
                                rm ./"$name".*
                                rm *.txt
                        else
                                sleep 1
                fi

done

Your root crontab can have the following added to automate the whole process. Of course change the script location and name as required. This will run the script every minute.

* * * * * /var/log/asterisk/recording/encodepost.sh 

Kununurra Allstar Node

node 42688 v2.1
  • Node Number: 42688
  • Freq: 439.150 Simplex
  • CTCSS: 77Hz
  • TX Tone: 77Hz
  • Power: 20W
  • Broadcasting the WIA News and VK6 NewsWest on Sunday at 0900 and 1900.

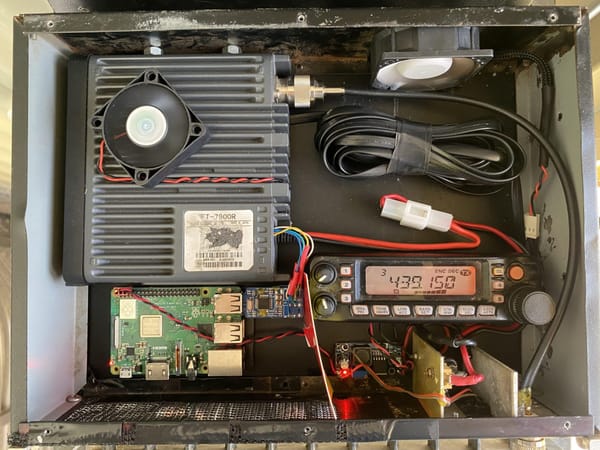
I’ve just built a basic node for use at my home QTH here in Kununurra. The node is made up of:

  • Yaesu FT-7900
  • Raspberry Pi 3
  • Free Drive USB Sound Card
  • Diamond NR-770HB

In and around Kununurra the node seems to give good coverage to about 5km from town.

The WIA National News and VK6 NewsWest will be broadcast on Sundays at 0900 and 1900.

The node will be connected to the VK6-Hub (42732) most of the time, so give me a call!

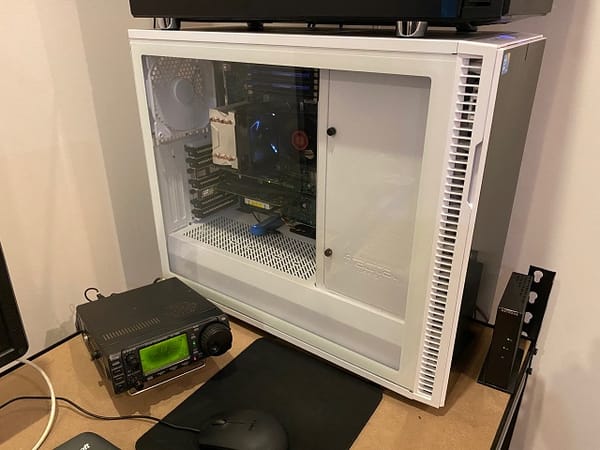
PROXMOX VE Xeon L5640 Project

About 12 months ago (2018) I decommissioned my FreeNAS based file server in preference of a Synology DS918+. While this device has been fantastic, and I do recommend it, it’s a bit boring and not fitting my theme of DIY and putting retro hardware to good use.

The main considerations for this build are:
  • Ability to run virtual machines.
  • As much retro hardware that makes sense.
  • Low power draw.
  • Reliable and very long lasting hardware.
  • CPU performance and feature set that will future proof this build for FreeNAS.
  • RAM upgrade capacity.
  • Plenty of physical drive capacity in the case that is easy to access.

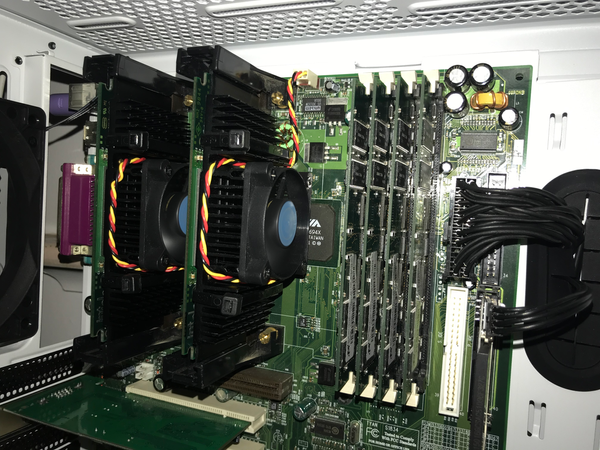
So here is a sneak peak of the project while I wait for the remainder of the parts to arrive.

Parts List

  • Intel Xeon L5640 CPU @ 2.27GHz, 6 Core HT with 12MB Cache, 60W (2010)
  • Super Micro X8STi Motherboard (~2010)
  • Fractal Design Define R6 in White with Glass Side
  • 48GB RAM
  • Corsair RM550x PSU
  • Cooler Master H411 Cooler
  • 2x 30GB SSD for OS (ZFS RAID1)
  • 3x 250GB SSD for VMs (ZFS RAIDZ1)
  • 4x 2TB HDD for Storage (ZFS RAIDZ2)

Continuing the retro theme, all the working parts are second hand and out dated from their usual intended purpose. Although in this build the parts are still reliability new, this is for power consumption, performance and reliability and also for certain feature sets on the CPU.

The board was chosen because it was relatively cheap to purchase with a CPU included. The CPU for its instruction set and very low power consumption. New PSU to help protect the nice hardware. Drives because they will be carried over from my old NAS. The Case for style, to show off the hardware, drive capacity (more than 10x 3.5″) and overall quality. And lastly the Cooler as they are quiet and long lasting.